Moodle LMS as a Service for Excellent E-Learning Experience
High Availability and Maximum Performance

Moodle is the World's Most Popular Learning Management System
Moodle is an open source LMS that is used by more than 213 million users worldwide. Most schools and universities in Indonesia use Moodle for their e-learning system.
Using Moodle on Dewacloud is very easy, scalable and very cost efficient.
Enable Automatic Clustering for Databases
The entire process of creating a MongoDB auto-cluster can be done in a few clicks.
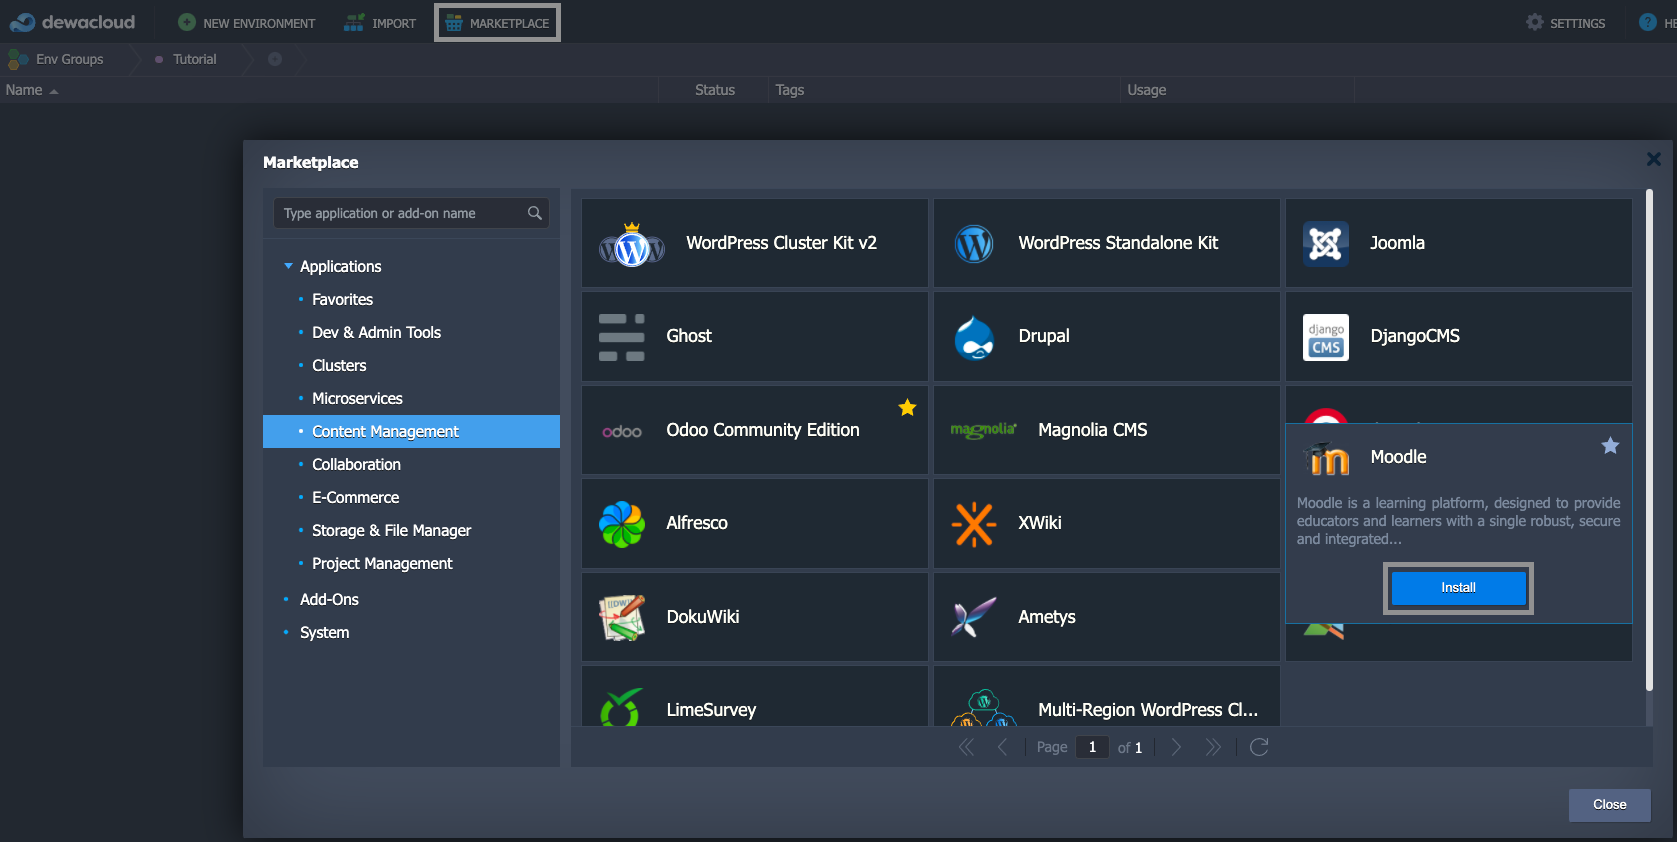
To get started, log in to the Dewacloud dashboard, find the Moodle application in the Marketplace and click Install.
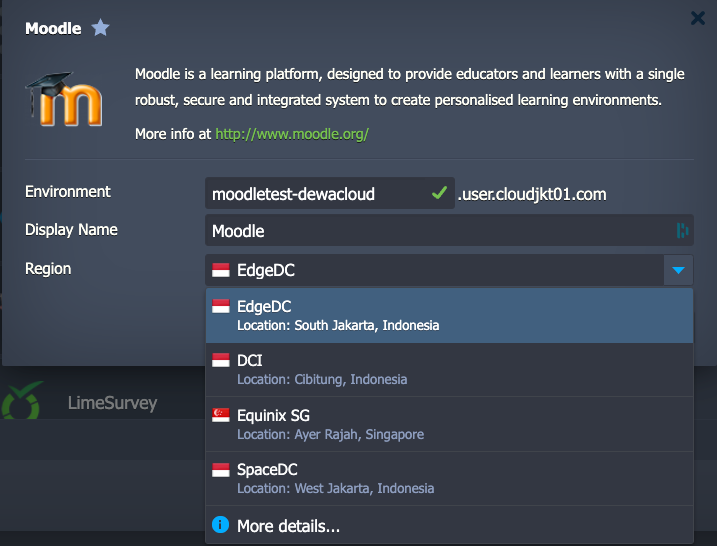
If required, change the Environment name and destination Region.
Use credentials to access an admin panel link from a successful installation window.

That’s it, the Moodle e-learning system is installed and ready to use.
Note:
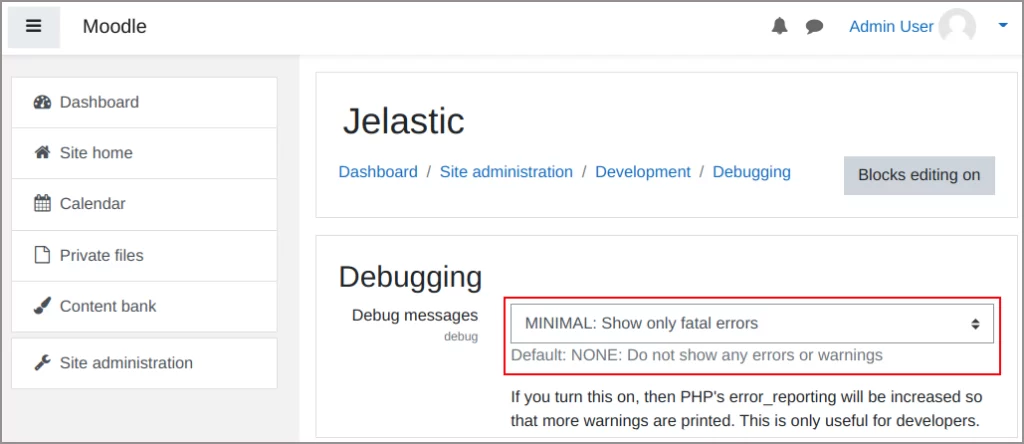
- In order to avoid any possible issues while your Moodle site is growing, we highly recommend enabling at least minimal debug level.
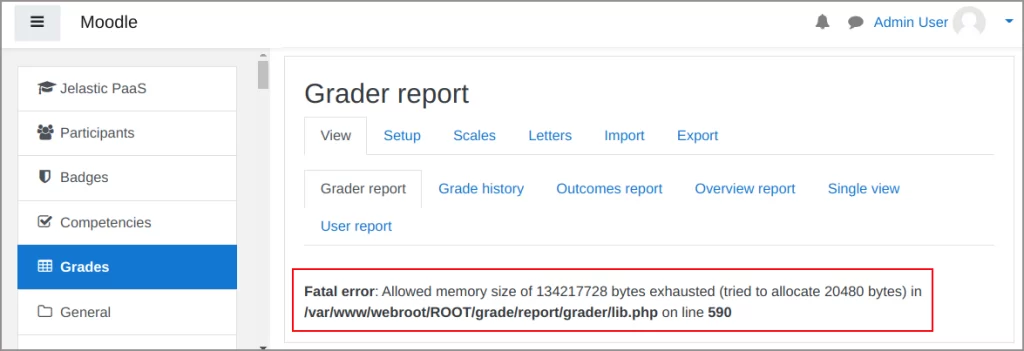
- If you encounter an error like in the picture below, increase the memory_limit parameter with 32 MB increments in the /etc/php.ini file until the error disappears. Restart the application server node after each setting change.

Moodle E-Learning System Upgrade
Based on the official documentation, updating to the latest version 3.11 can be done directly from version 3.6 or later. If you want to upgrade from a version before 3.6, you must upgrade to version 3.6 first. If you are already using Moodle and the version is out of date, you can update it to the latest version by following the following steps.
There are three assets areas that should be backed up before any upgrade:
- Moodle software (/var/www/webroot/ROOT)
- Moodle static assets (/var/www/webroot/moodledata)
- Moodle dynamic content (database dump)
Log in via SSH to the Application Server node and create backup files of mentioned assets respectively with commands:
- $ cd /var/www/webroot
- $ tar -czvf moodledata_code.tar.gz ROOT/
- $ tar -czvf moodledata.tar.gz moodledata/
- $ mysqldump -h node303649-moodle.vip.jelastic.cloud -u root -p moodle –column-statistics=0 > moodle_dump.sql
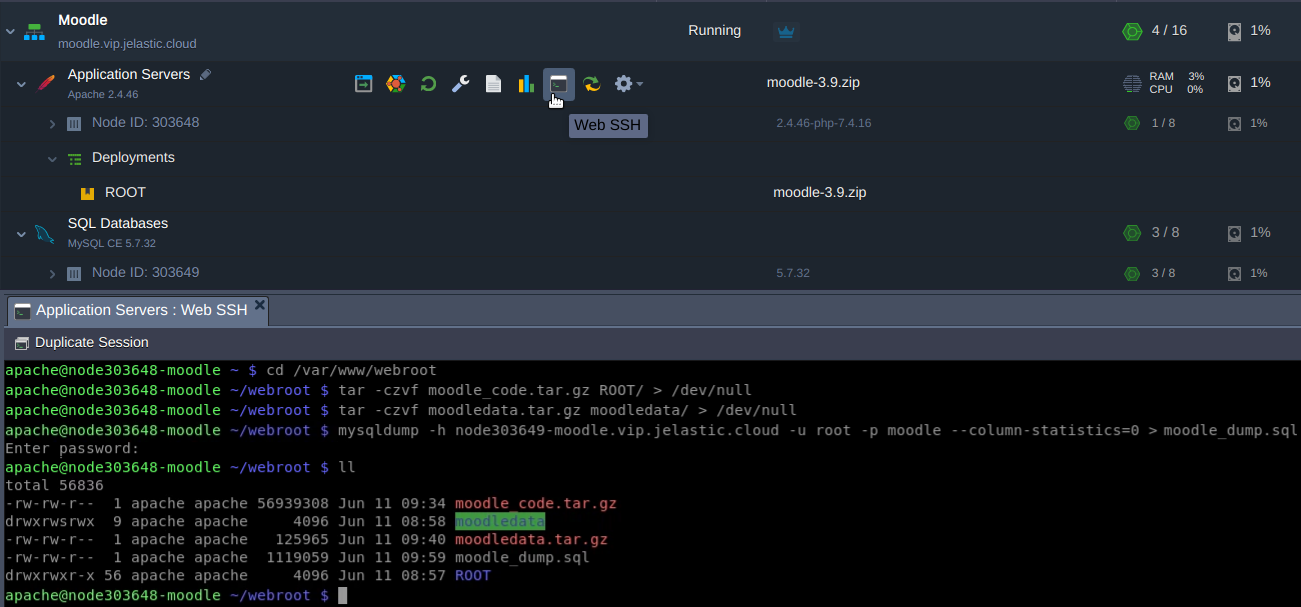
Note: The database access credentials can be taken from email sent to your mailbox upon application installation.
Before taking the update actions, turn the e-learning system into Maintenance Mode. Go to the Administration > Site administration > Server > Maintenance mode and enable it.

If required, add an optional message to be displayed during system upgrade.

Step 1:
Go to the Application Server terminal and get the latest version of moodle. currently it is 3.11.
- $ cd /var/www/webroot
- $ wget https://download.moodle.org/stable311/moodle-3.11.tgz
Step 2:
Then rename Moodle software directory ROOT to another name e.g. ROOT.backup.
- $ mv ROOT/ ROOT.backup
Step 3:
Extract files from archive:
- $ tar -xvzf moodle-3.11.tgz
Step 4:
Rename extracted directory moodle to the ROOT:
- $ mv moodle ROOT
Step 5:
Next, copy config.php, any custom plugins, and your .htaccess file if any from ROOT.backup to the ROOT directory. In our case you have no custom plugins or .htaccess file, since that:
- $ cp ROOT.backup/config.php ROOT
Step 6:
Restore custom themes and modules if any. For example:
- $ cp -pr ROOT.backup/theme/mytheme ROOT/theme/mytheme
- $ cp -pr ROOT.backup/mod/mymod ROOT/mod/mymod
Step 7:
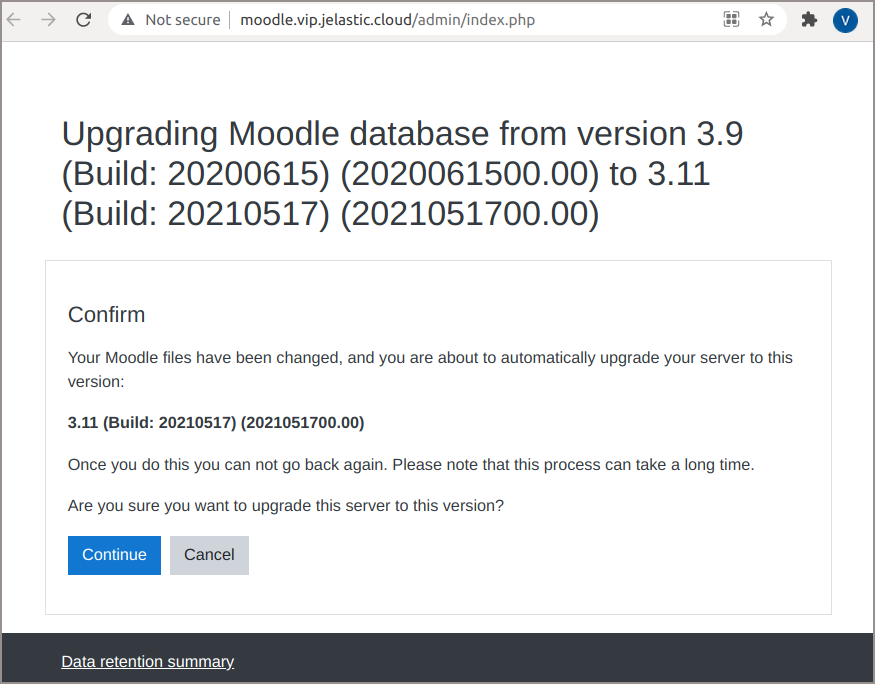
While finishing upgrade, open your Moodle URL with context path /admin, for example, http://moodle.vip.jelastic.cloud/admin and press Continue.
Step 8:
Review Current release information page, then scroll it down and press Continue.

Step 9:
After that the Plugins check page appears. You may check the plugins for available updates and install them or you may do it later, just scroll down the page and press Upgrade Moodle database now.

Step 10:
Wait for the process to be completed and click on Continue.
Step 11:
The next step is to change and apply system settings added during Moodle upgrade.

Carefully review them all, change which one you prefer and press Save changes.
Step 12:
Finally disable the Maintenance mode at the Administration > Site administration > Server > Maintenance mode.
Congratulations! A new version of Moodle e-learning system is ready for operation.
Install Moodle in One Click!
Buyucloud provides Moodle which can be installed quickly and easily. Free for 14 days, after that Moodle application hosting fees will be calculated hourly based on resource usage.